
Thanks to the ability of version control, Reconstruct has an approach on how to manage your schedule for the rest of the team to see, while at the same time enabling safe use of the platform by helping avoid undesired modifications to your schedule, as well as displaying only what has been made public to the rest of team, while maintaining any ongoing edits you will be making during your project.
Edit Your Schedule
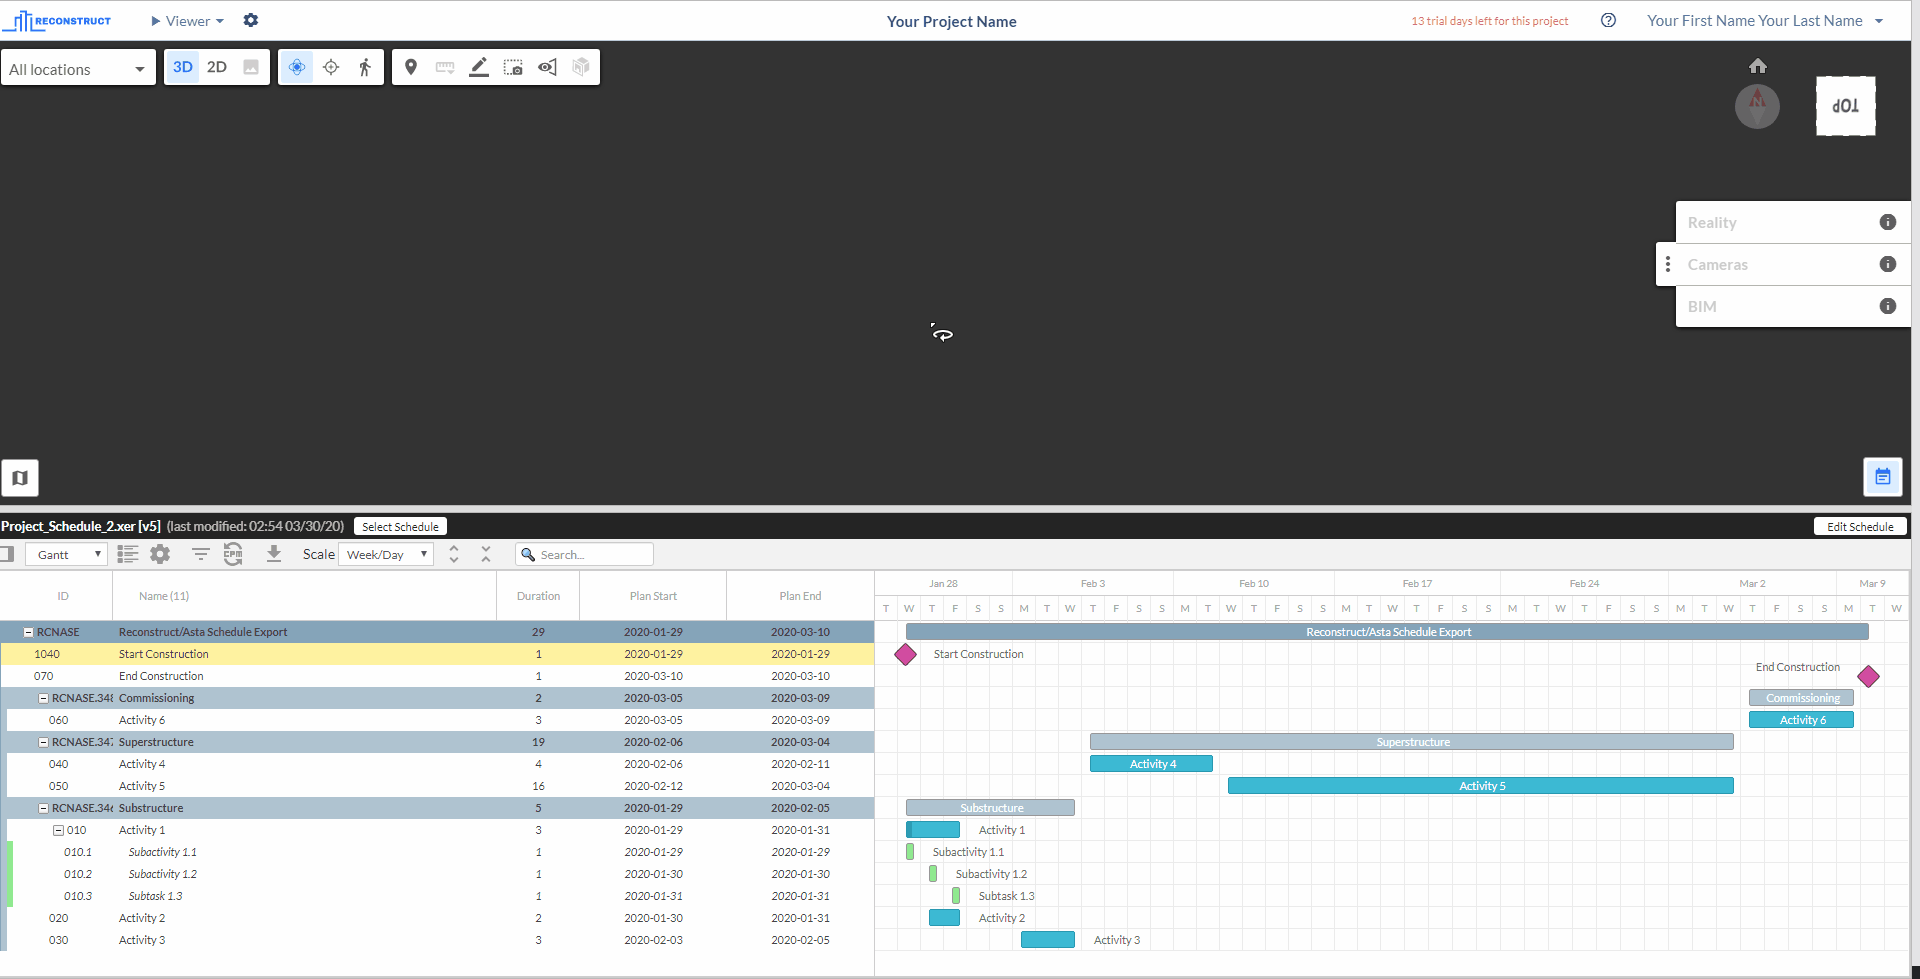
Reconstruct gives you plenty of freedom when it comes to editing a schedule. From adding new activities and tasks, to editing the information, settings, and 3D objects assigned to an existing activity or task, "Edit mode" enables all these functions.
To access the edit mode, simply click on the upper-right "Edit Schedule" button. You will know you are in edit mode by identifying a blue colored window bar at the top of your schedule pane:
Publish Your Schedule
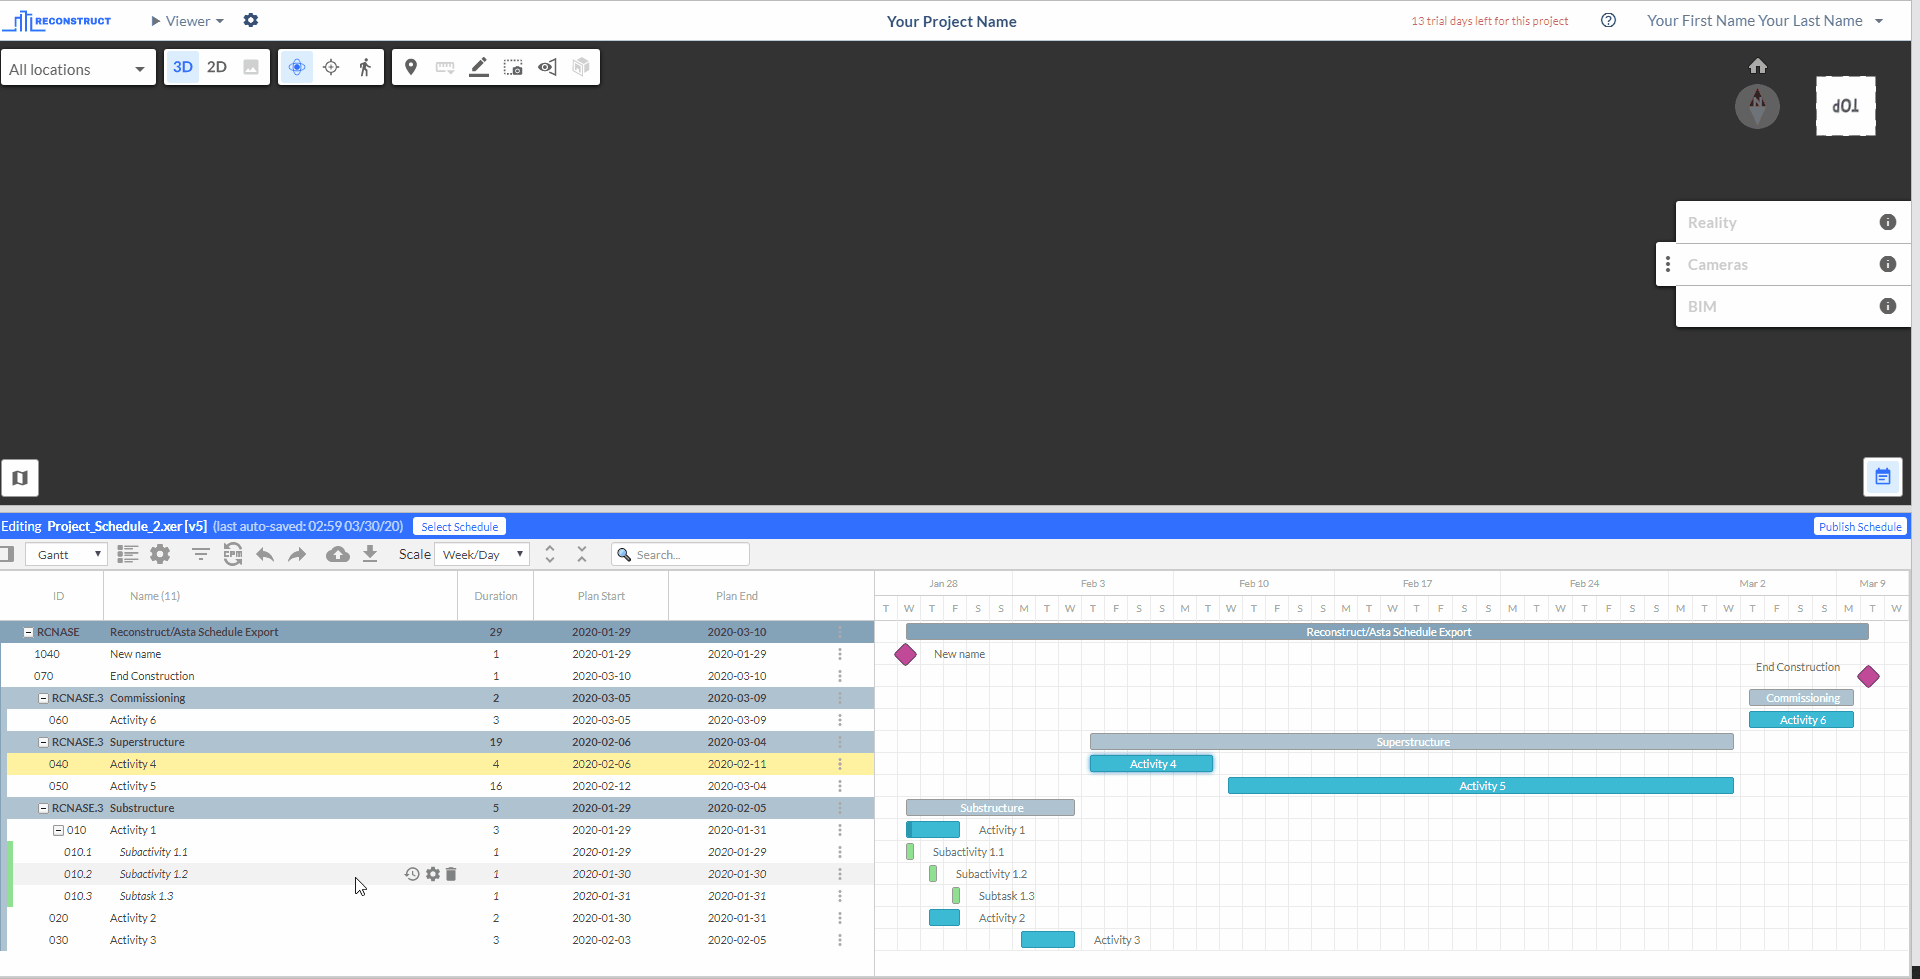
After making any edits, if you wish the rest of the team to keep on using the new version of the schedule you have been modifying, you may do so by "publishing" your schedule. Once a schedule is published, all editing tasks are hidden, allowing your team to focus on interacting with the schedule without the concern of making any unwanted modifications. You will know you are in publish mode by identifying a black colored window bar at the top of your schedule pane:
While in Publish mode, actions are limited to opening up the Activity & Project Feed logs, and specifying what Reporting mode criteria you wish to use for a selected activity.
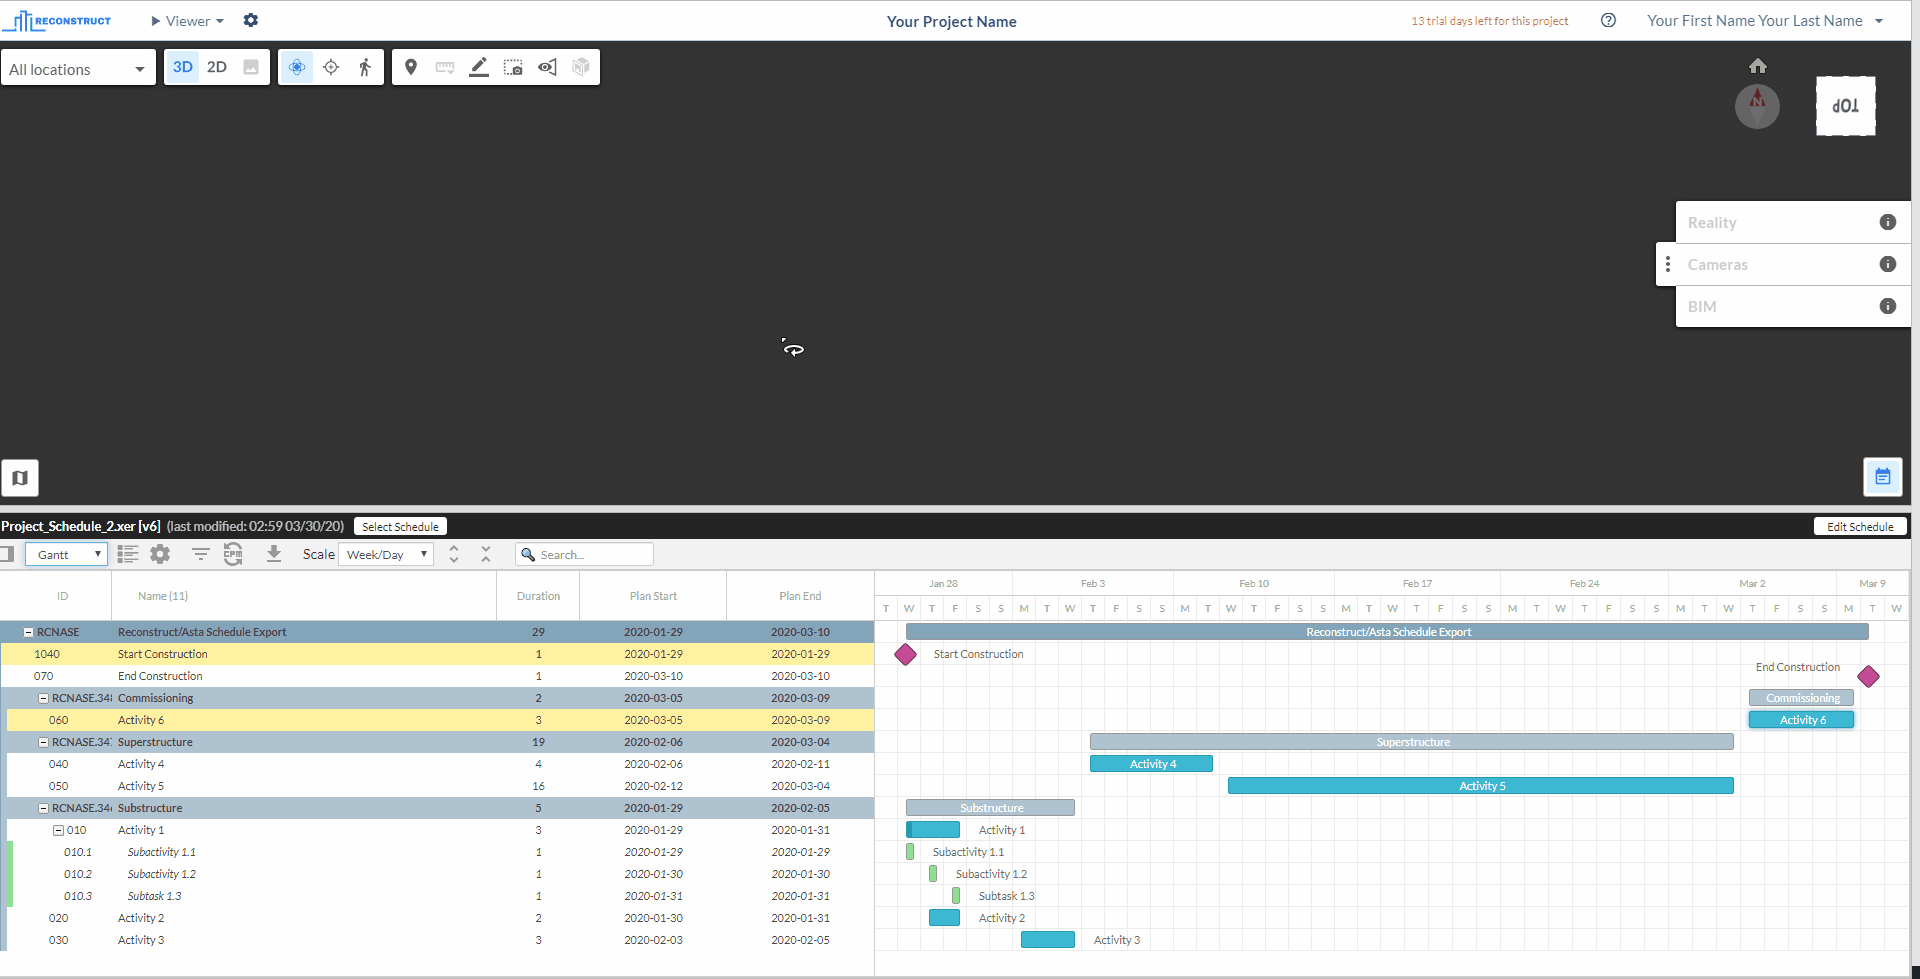
Notice that once every time you publish a schedule, it will be saved as a new version, allowing you to return back to any previous version of the same schedule. In this particular example shown above, the schedule went from version 5 to version 6 after publishing.
Edit and Publish for Progress View
The same criteria explained above applies for the Progress view of your schedule. If you wish to input any progress information into any of your activities or tasks, you may do so while in edit mode. Make sure to "publish" once reports are in:
Edit and Publish from the Data Manager
Both editing and publishing your schedules can also be done from the Schedule tab in the Data Manager. Check the box for the schedule you wish to interact with, then click on the "Set to" button located at the upper right corner of the data manager, and select one of the two options given on the dropdown.
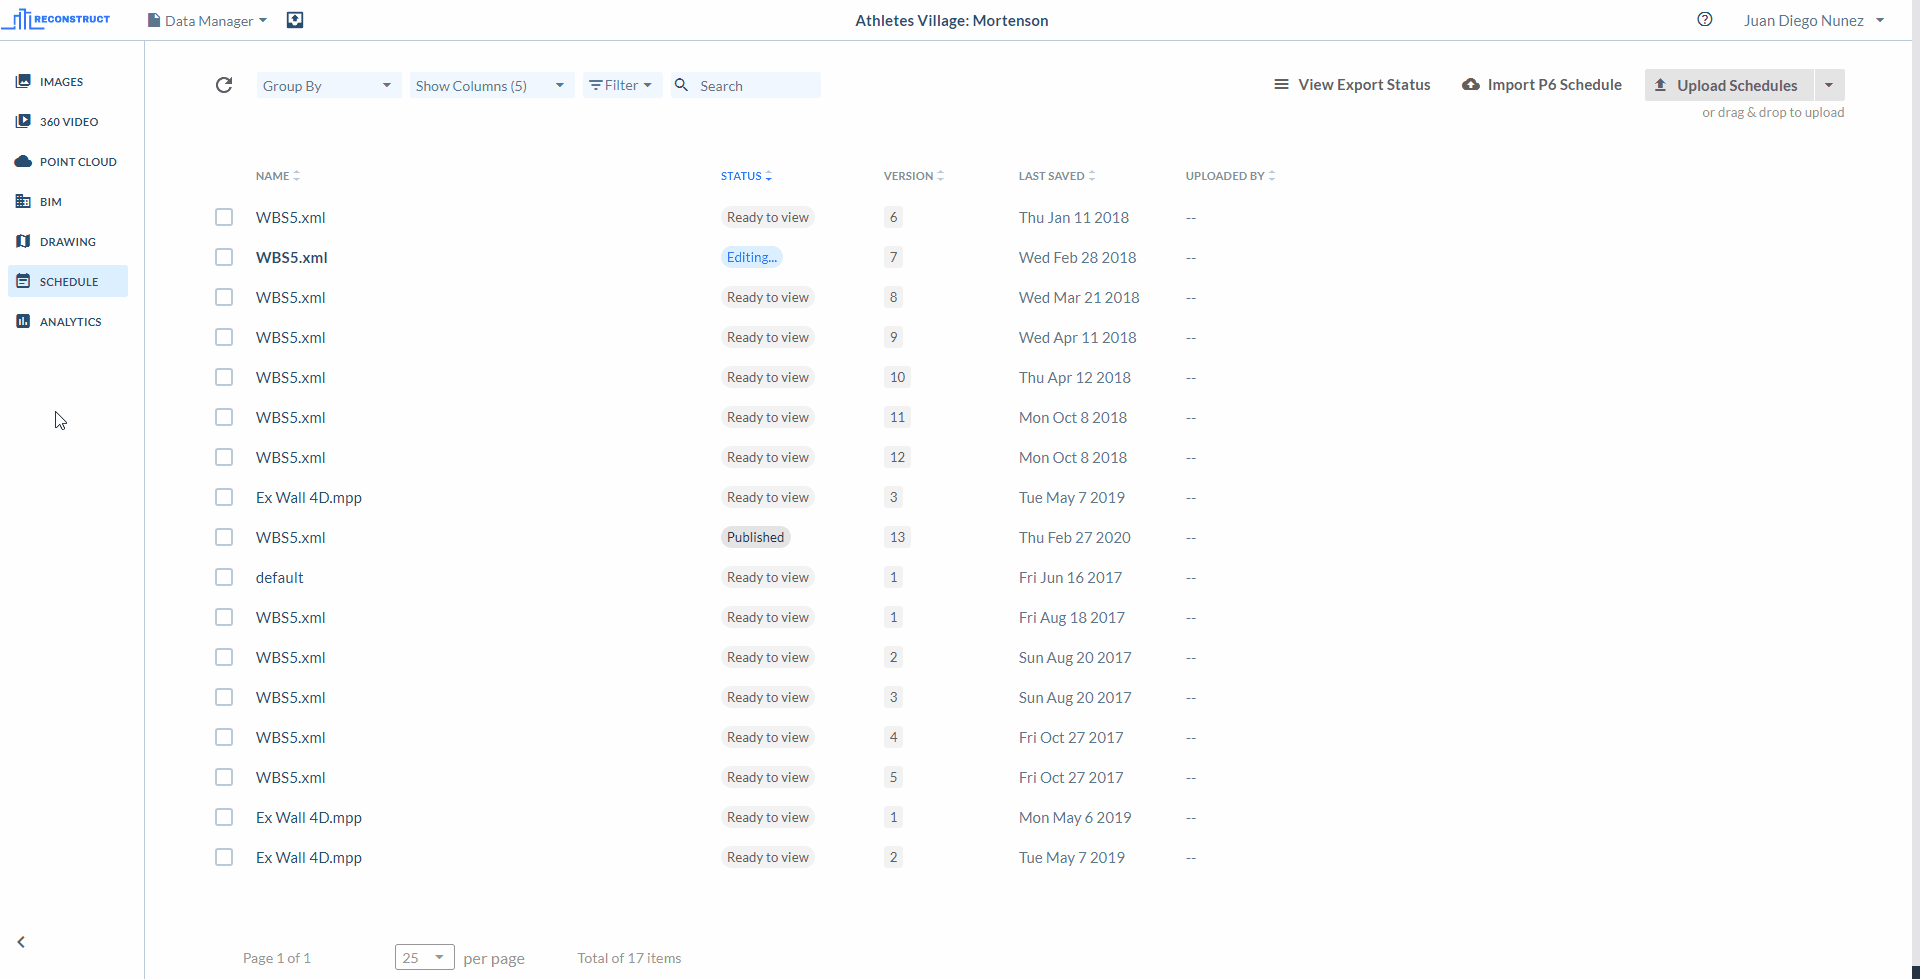
Note that only 1 schedule can be published, and only 1 schedule can be edited at a time. The "status" column will indicate which schedule is currently published or being edited.
Published Schedules in the Reporter App
If you are making use of our Reporter App, make sure you Publish whichever schedule you wish to use in the app, using the Data Manager in the web platform. The published schedule is the schedule you will be using in the app.
Comments
0 comments
Please sign in to leave a comment.