
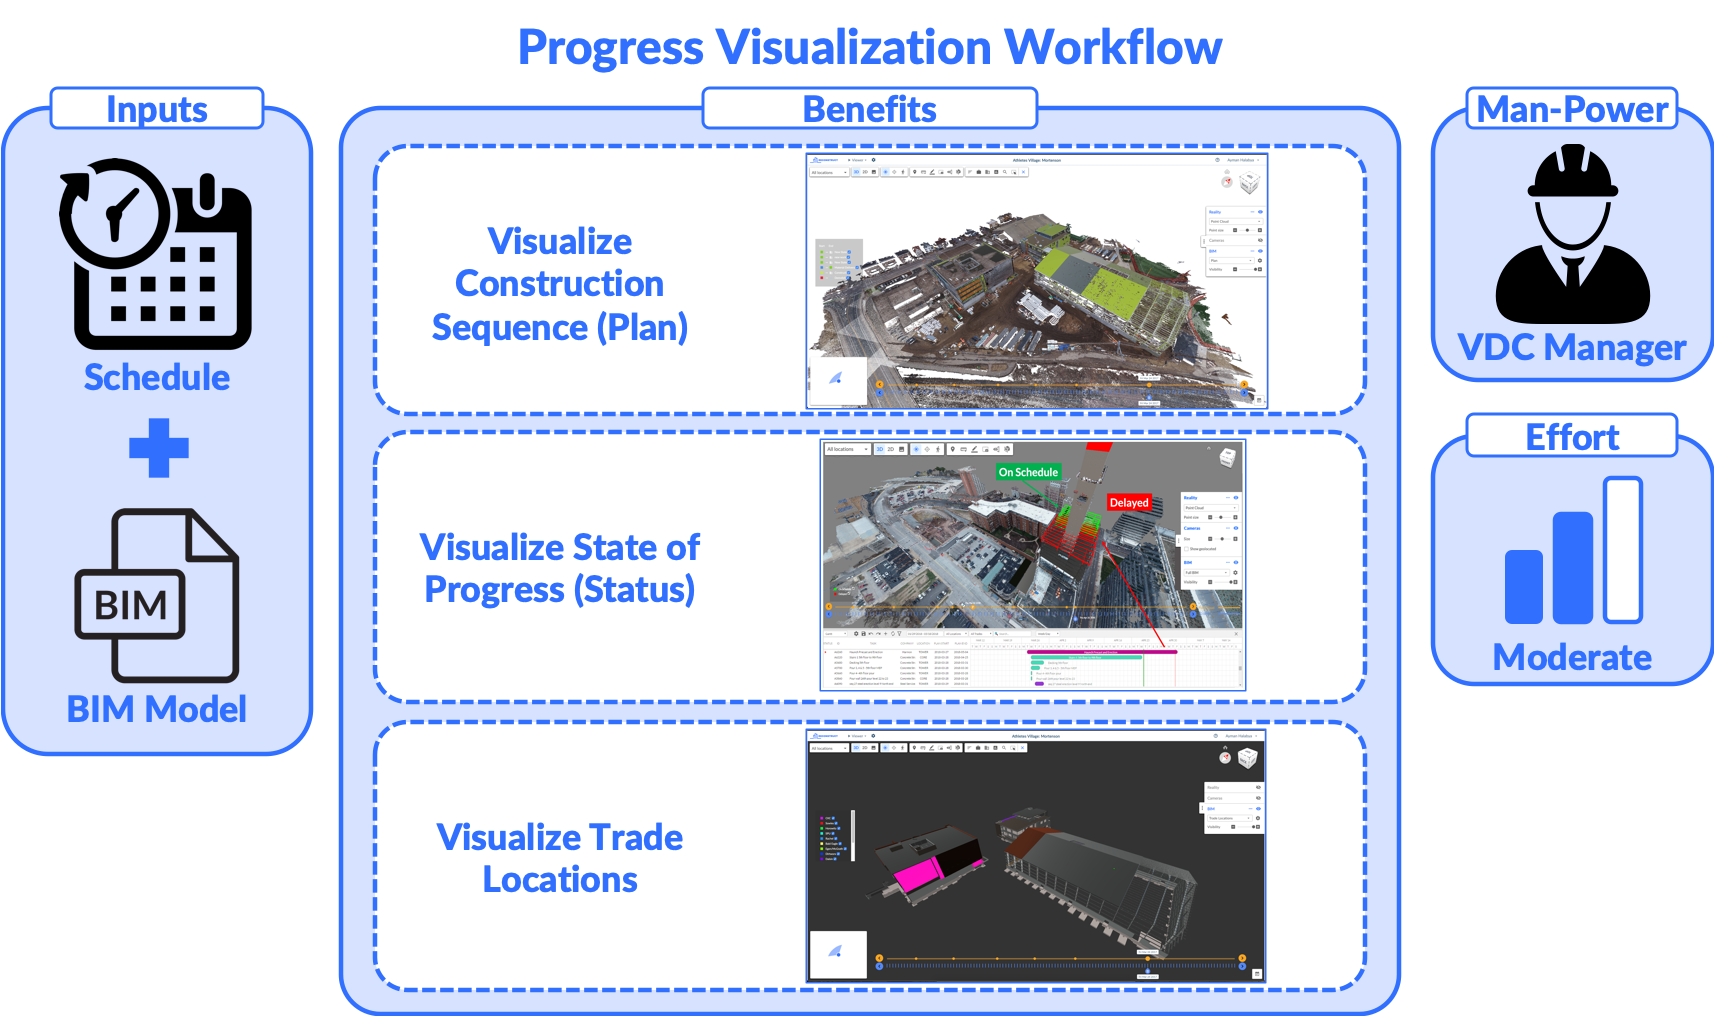
Reconstruct supports multiple workflows that cater to different users in the construction process. This article explains how to use the tools and features in Reconstruct cloud-based platform to update the status of your project and get dynamic progress reports. This workflow enables users to:
- View the schedule from anywhere
- Breakdown master schedule activities into sub-tasks to generate lookahead schedules
- Update the status of all activities in the master schedule and lookahead using Reconstruct Reporter App
- Capture images, comments, and rootcauses for delay for each activity in the schedule
- Generate dynamic reports to summarize project progress
What You Need
To get started with this workflow you need the following:
- BIM models of your project
- Construction schedule (P6, MS Project, or Asta Power)
- iOS Device (iPhone or iPad)
Getting Started
You should follow the steps below to get started with this workflow:
Step #1: Login to Reconstruct on your computer
If this is your first time to use Reconstruct, then you will need to create an account, login, and go to the Data Manager. It is important to do this step on a computer using Google Chrome or Mozilla Firefox web browsers.
Step #2: Upload BIM models of your project
Reconstruct supports more than 60 formats of BIM files. You should upload your BIM files into Reconstruct Data Manager.
Step #3: Assign locations
Once your BIM models are uploaded to Reconstruct you should create locations and identify bounding boxes for each of them.
Step #4: Upload a schedule of your project
Reconstruct supports schedules in several formats. You should upload the construction schedule for your project, and publish it.
Step #5: Link BIM and schedule
You can create a link between BIM elements and schedule activities natively inside Reconstruct. This is usually established by selecting BIM elements, selecting schedule items, then right-clicking the schedule activities and selecting "Assign BIM elements". Read this article for more information.
Step #6: Visualize Construction Plan
Once you establish a link between BIM and Schedule, you will be able to visualize your schedule.

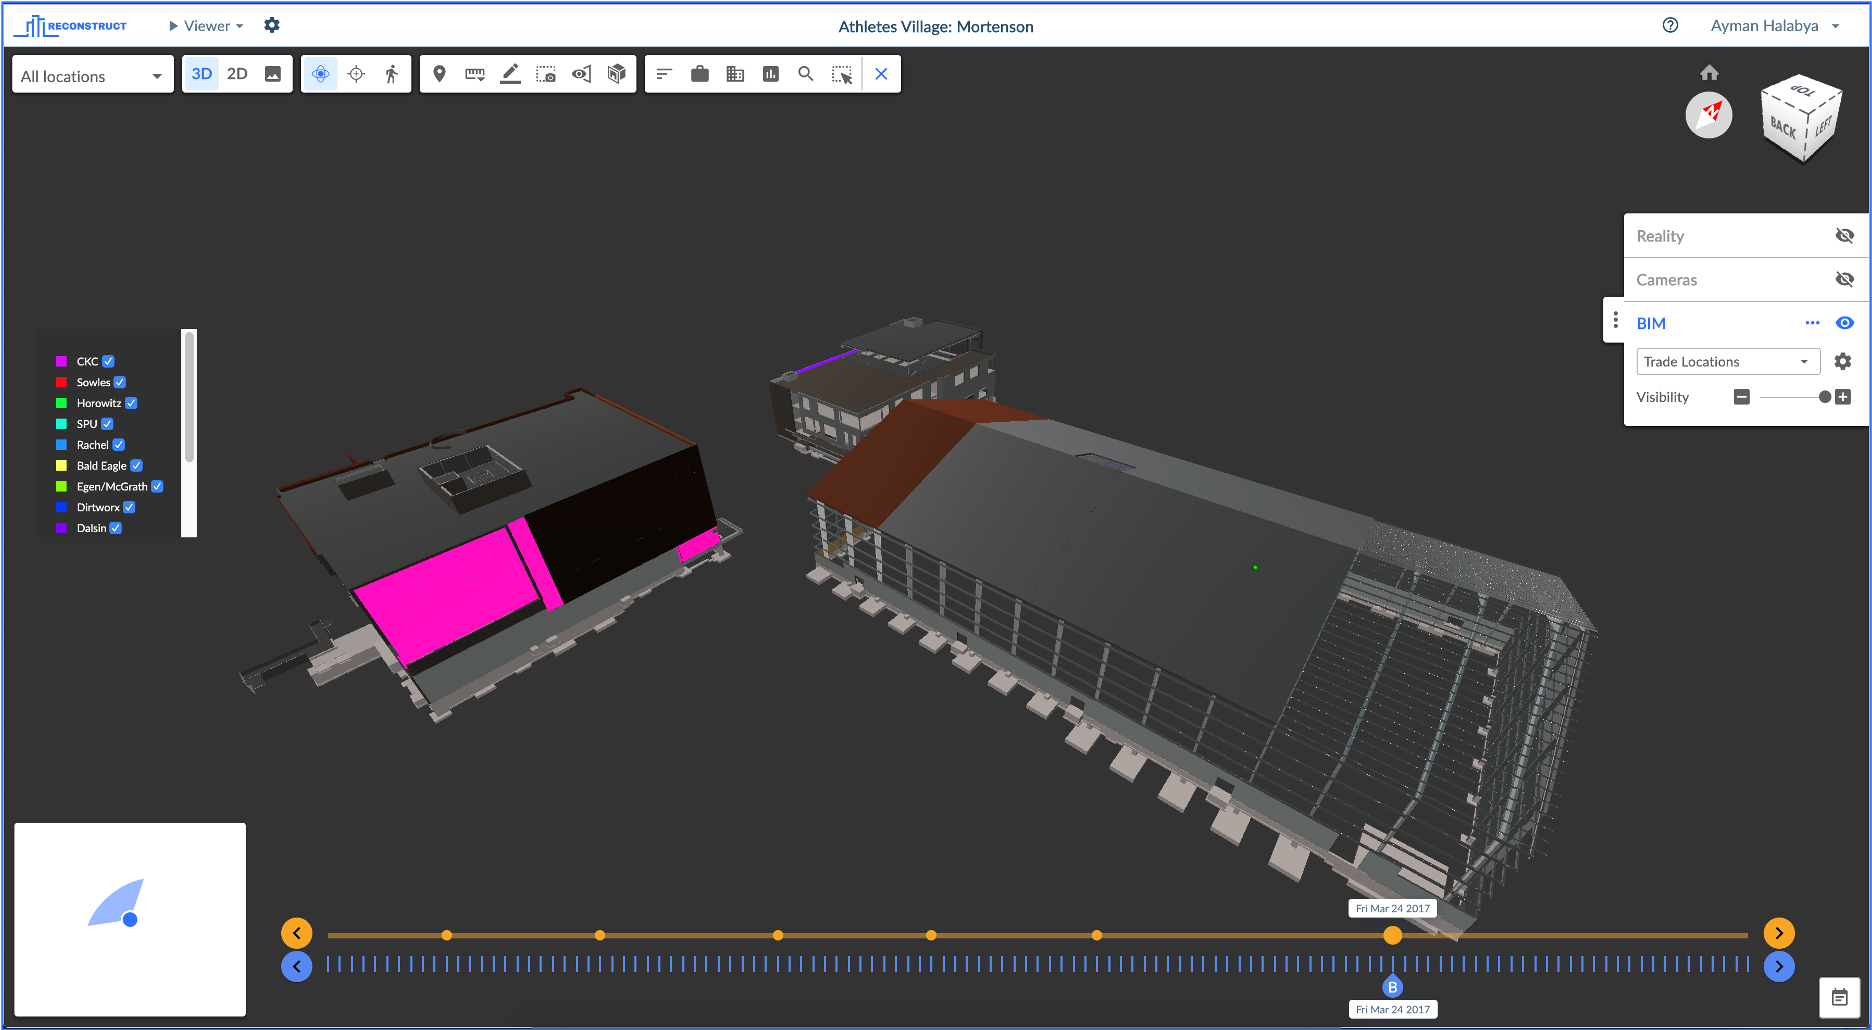
Step #7: Visualize Trade Locations
Once you establish a link between BIM and Schedule, you will be able to visualize trade locations.
Step #8: Visualize State of progress
Once you establish a link between BIM and Schedule, you will be able to visualize the state of progress of your project..

Comments
0 comments
Article is closed for comments.