
Reconstruct supports multiple workflows that cater to different users in the construction process. This article explains how to use the tools and features in Reconstruct cloud-based platform to create 3D reality models of the existing conditions of your construction site, and (by repeating this process) create a historical record of the changes in the project. This workflow enables users to:
-
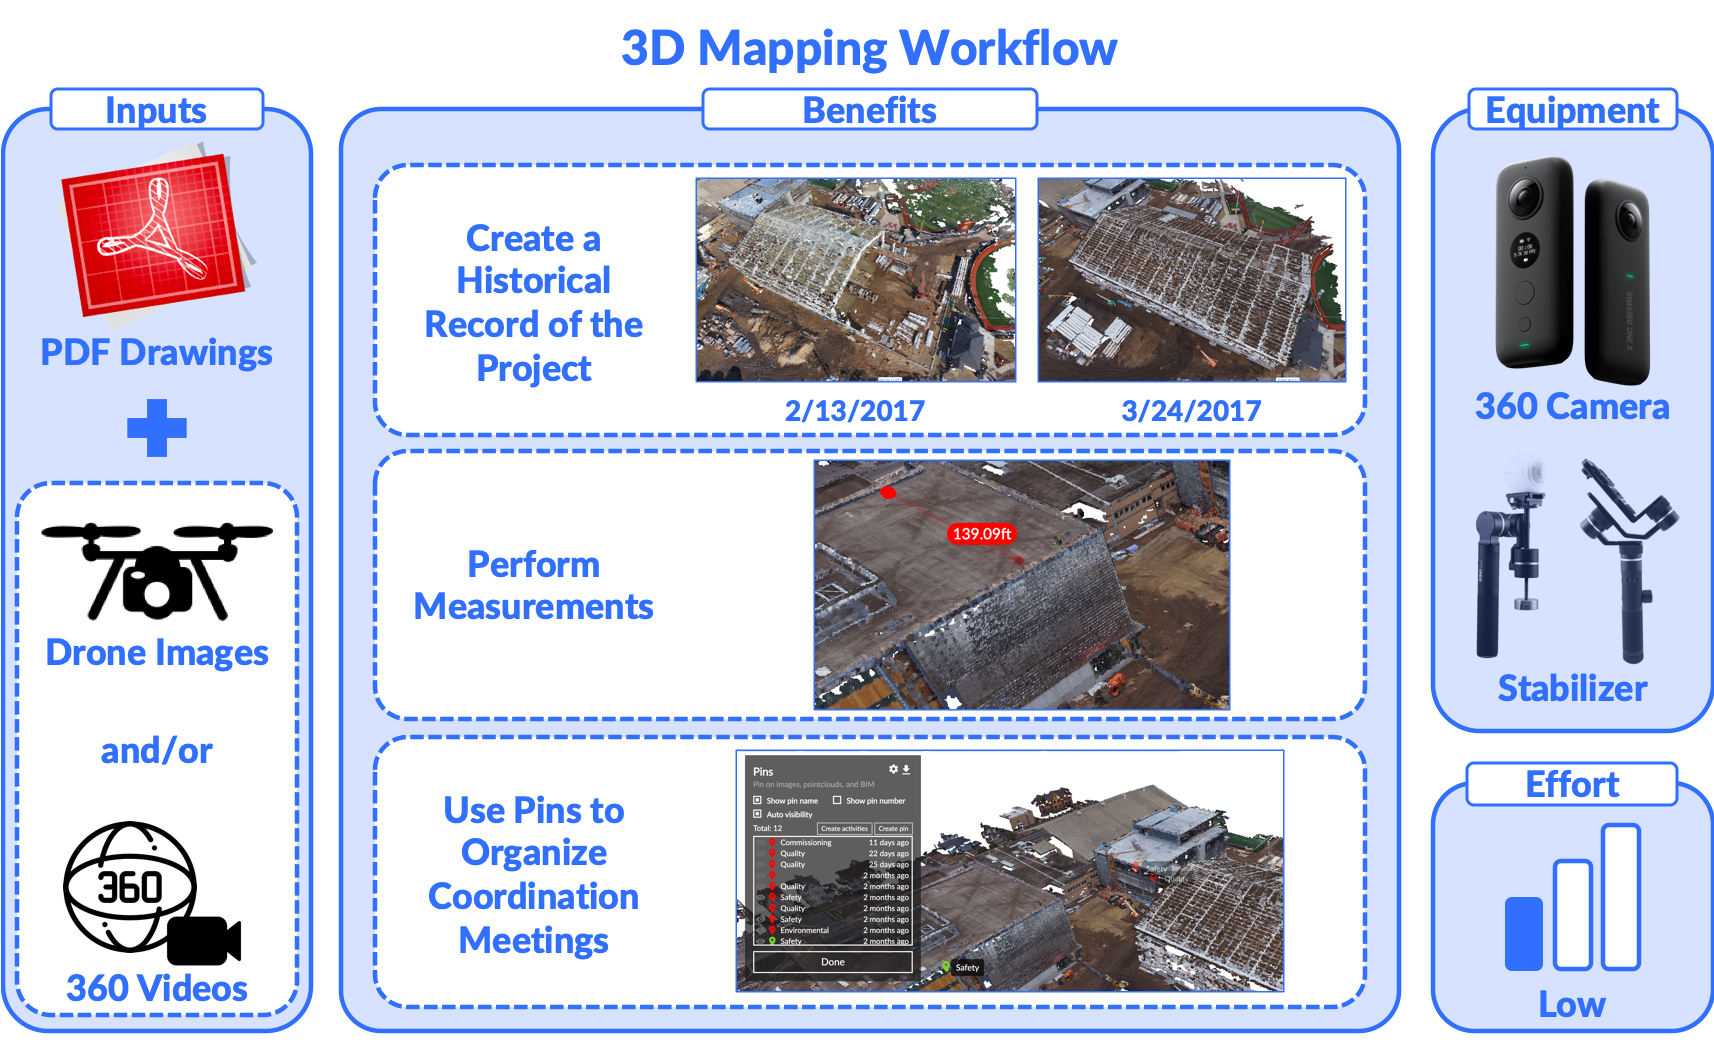
- Document the existing conditions of the construction site by generating point clouds and reality models from drone images or 360 videos
- Use Reconstruct Capture App to capture 360 videos and images of the construction site and place them on PDF drawings
- Repeat that documentation process over the project duration to create a historical record of the changes in the project
- Perform measurements on the generated reality models
- Use Pins, Viewpoints, Markup, and Snapshot tools in Reconstruct to visually drive coordination among project participants (Owner, GC, Subs, etc.
What You Need
To get started with this workflow you need the following:
- PDF drawings of your floor plans
- One or more of the following:
- Drone images of the exterior of your project
- You can fly the drone in-house, by training one of your project engineers
- You can outsource the capture to a third party capture provider
- 360 videos of the interior or exterior of your project
- You need to purchase a 360 camera and stabilizer
- Drone images of the exterior of your project
Getting Started
Once you have your purchased your equipment, you should follow the steps below to get started with this workflow:
Step #1: Login to Reconstruct on your computer
If this is your first time to use Reconstruct, then you will need to create an account, login, and go to the Data Manager. It is important to do this step on a computer using Google Chrome or Mozilla Firefox web browsers.
Step #2: Upload PDF drawings to Reconstruct
Prepare the floor plans of your project in PDF format. You can have them in separate single-page PDF files, or one multi-page PDF file. Note that it will take longer to upload a multi-page file, as Reconstruct will have to split it into single pages upon upload. In most cases, the architectural floor plans of your project will be the best option to upload. However, in some cases you might need to upload structural or foundation floor plans instead. You can upload several floor plans per floor. Click here to learn more about uploading your drawings to Reconstruct.
Step #3: Assign locations to your drawings
Once your PDF files are uploaded to Reconstruct you should assign locations to each of these drawings to make it easier to capture your images later.
Step #4: Download and install Reconstruct Capture app on your iOS device
Click here to download Reconstruct Capture app from the Appstore. Once the app is installed on your iOS device, use your Reconstruct username and password to login to the app.
Step #5: Connect your 360 camera to the app
Once logged in to the app, you should connect your 360 camera by following the instructions here.
Step #6: Capture 360 videos of your indoor and outdoor spaces
Use the Reconstruct Capture app to guide you through capturing 360 videos of your projects. Also, check our guidelines for 360 video capture.
Step #7: Stitch the captured 360 videos on your computer
The raw format of the 360 videos usually includes one or two files in INSV or other proprietary formats. Once you captured your 360 videos, you will most likely need to stitch them and convert them into MP4 format.
Step #8: Upload 360 videos and process point clouds
Once your videos are captured, stitched, and converted into MP4 format, you should upload them into Reconstruct and process them to create point clouds. Click here for more information.
Step #9: Capture Drone images
If you are planning to use drones to capture the core and shell phase of your project, then you need to follow our guidelines to achieve a good quality capture.
Step #10: Upload and process Drone images
Once you captured drone images according to Reconstruct guidelines, you should upload them and process them into point clouds.
Step #11: Align drawings and point clouds
Once the point clouds are processed and ready, you will receive an email from Reconstruct. Follow the instructions here to align your point clouds to the PDF drawings you uploaded in Step #2.
Step #12: View point clouds and overlay on drawings
After your point clouds are captured, processed, and aligned, they are ready for you to view them by navigating our 2D Viewer.
Step #13: Repeat the capture process if needed
You can repeat steps 6 to 11 as needed (e.g. every week) to create a historical record of the changes in your project.
Comments
0 comments
Article is closed for comments.