
The 3D viewer can combine BIM, reality models, images, annotations, markup, and schedules. It has several components for navigation: 1) Title Bar, 2) Main Toolbar, 3) Navigation Cube, 4) Control Panel, 5) Navmap, 6) Timeline, and 7) Schedule.
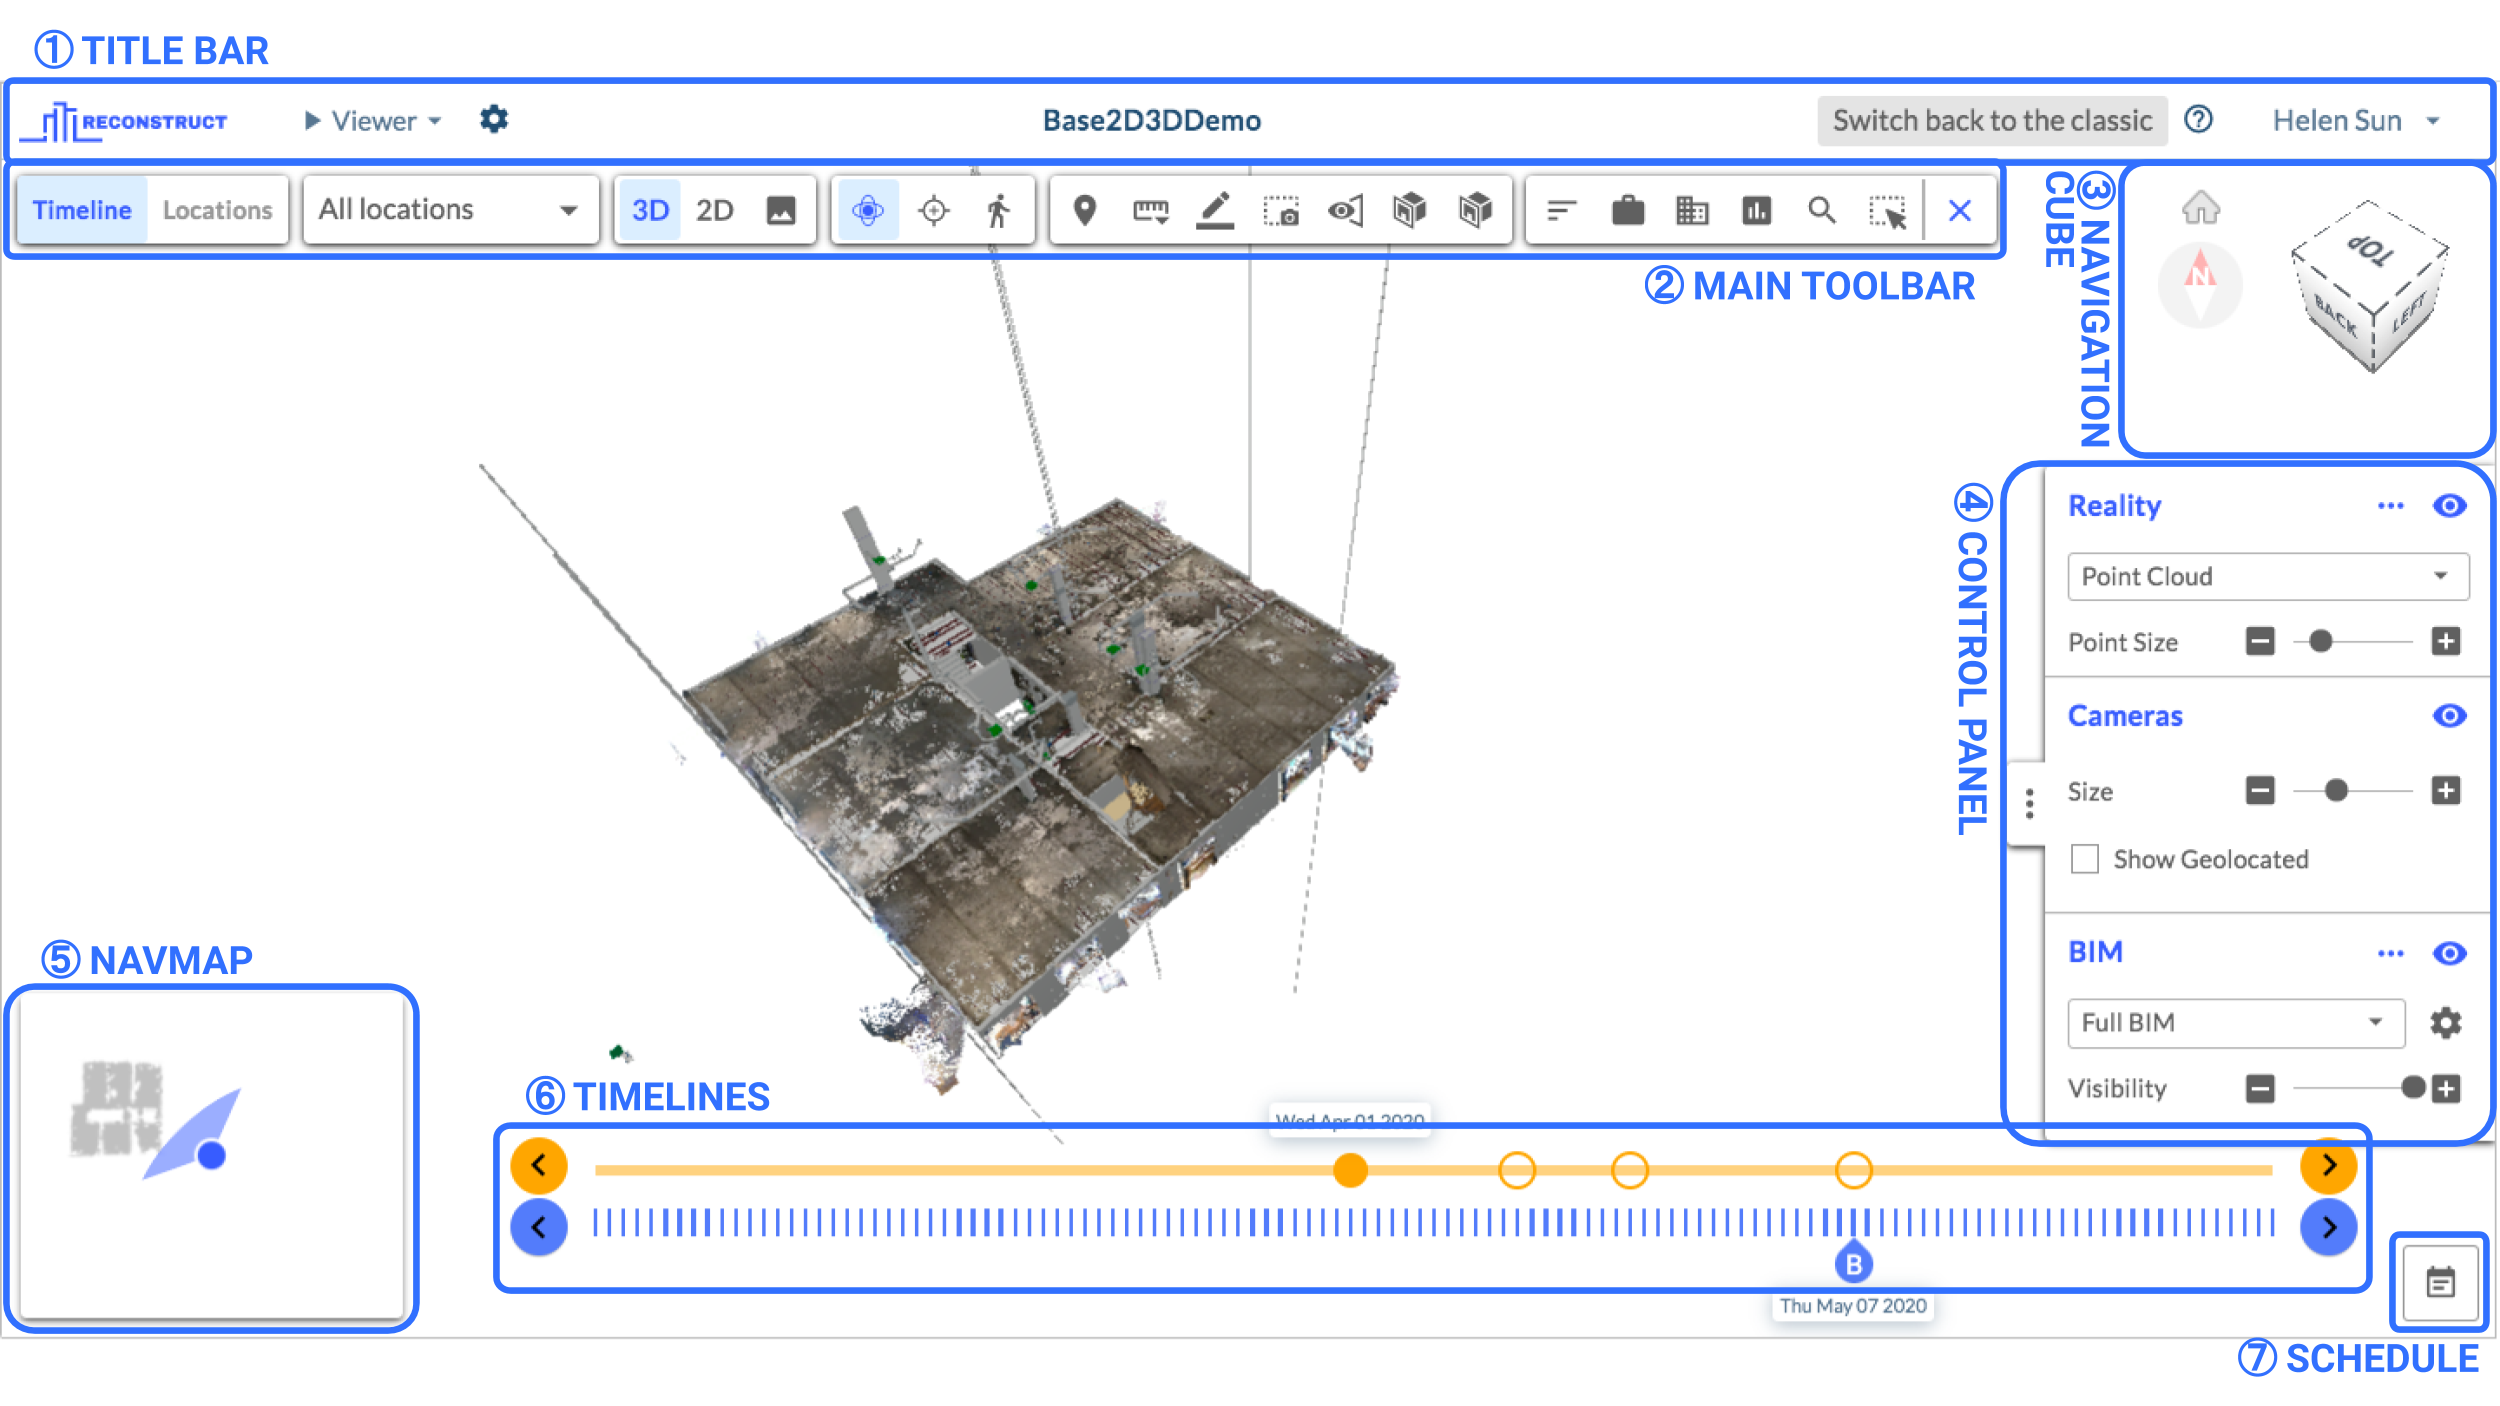
Title Bar
The title bar is located at the top of the screen and includes the project navigation dropdown, viewer settings, project name, help center link, and your profile info dropdown.

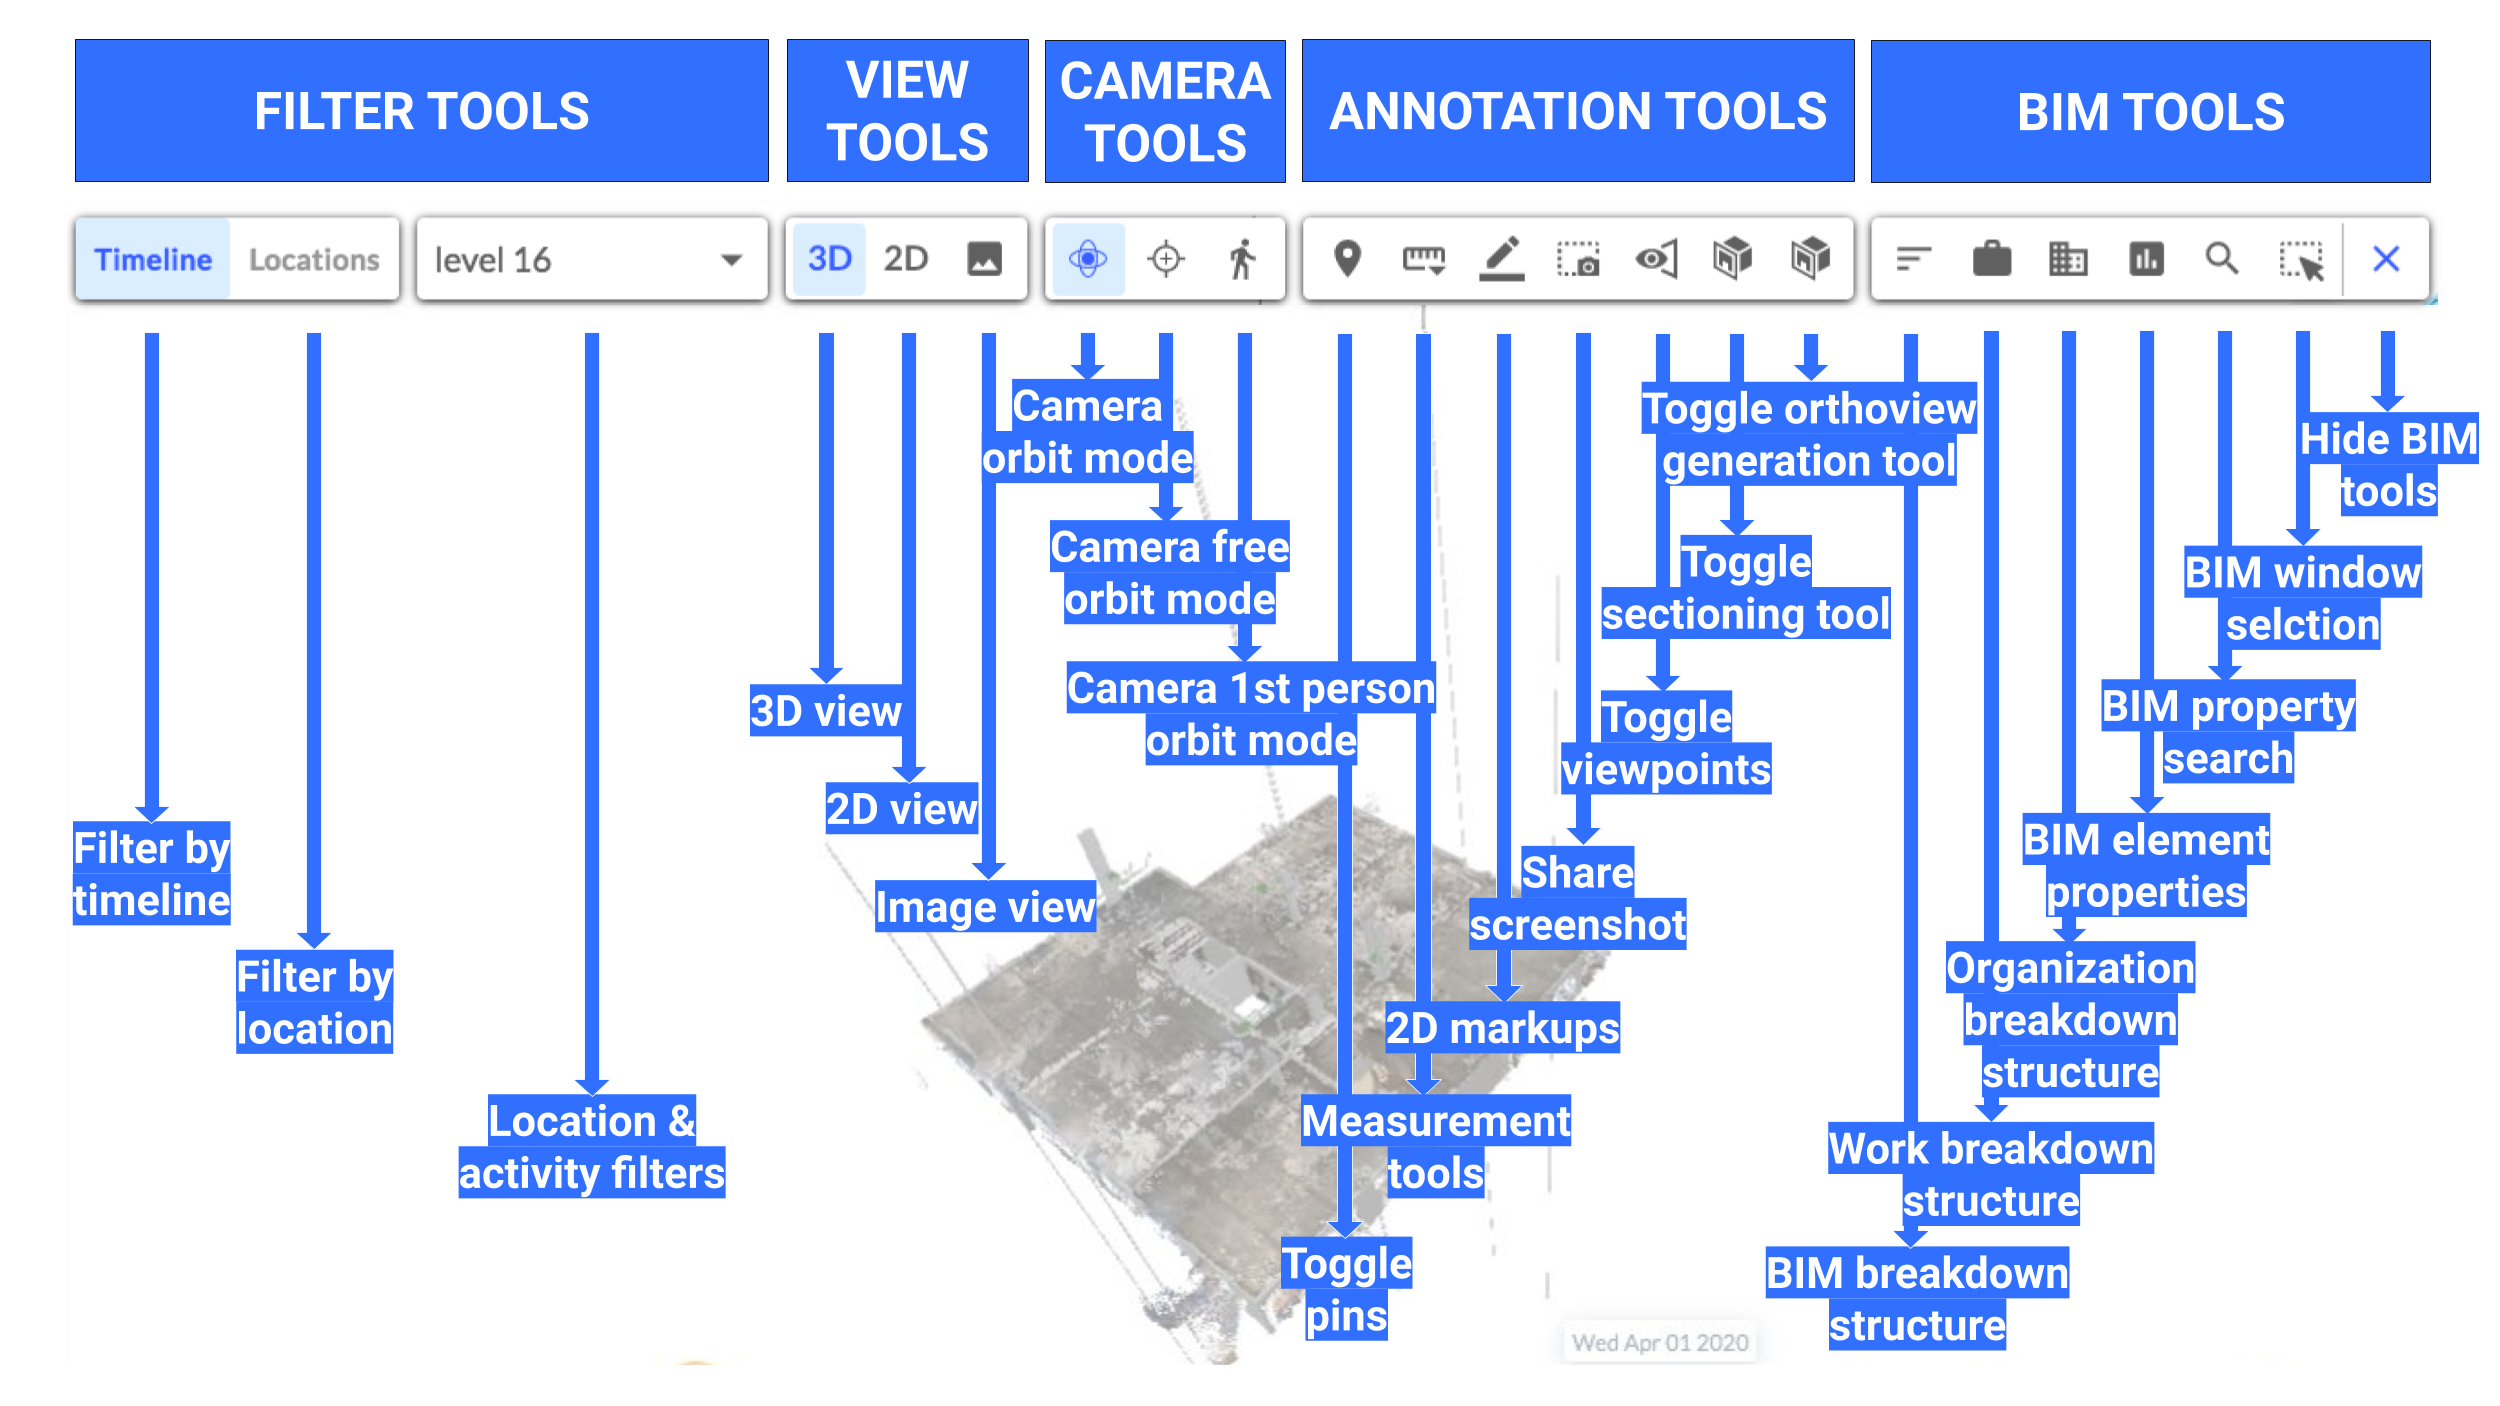
Main Toolbar
The main toolbar is located on the top left side of the screen right below the title bar. This toolbar hosts many tools as indicated in the diagram below split into five categories: filter tools, view tools, camera tools, annotation tools, and BIM tools.
Navigation Cube
The navigation cube is located on the top right side of the screen right under the title bar. This cube is widely used in most 3D software packages and it behaves similarly in Reconstruct. You can use the cube to:
- Move to the home view.
- Move to any of the standard directions (top, bottom, left, right, front, back).
- Move to 3D views from the cube corners.
From the dropdown menu, you can switch between perspective and orthographic projection and set up the top, front, and home view.
Read the following article to review how to orbit, pan, and zoom.

Control Panel
The control panel is located on the right side of the screen and it can be used to control how all the components are displayed in the viewer. Use the control panel to control BIM, control reality models, and control cameras and images in addition to the other functions demonstrated below. With new improvements, textured meshes only load on demand by selecting the dropdown under the Reality tab which expedites the initialization of Reconstruct viewer by 56%.

Navmap
The navmap (short for navigation map) shows the location of the user in reference to the reality model or the drawings.

Timelines
Use the orange 4D reality timeline and the blue 4D BIM timeline to visualize progress, trade locations, and at-risk locations.

Schedule
The schedule shows the project schedules uploaded via the data manager. Compare schedule tasks and BIM elements side-by-side and link them together for a 4D BIM simulation.

Comments
0 comments
Article is closed for comments.