
View images directly overlaid on top of point clouds and BIM models by diving into image view. The control panel changes once this view is activated.
Diving Into Images Via Point Cloud
Find the closest image to a specific area in a point cloud by clicking in that region. An image thumbnail will appear next to your mouse cursor showing the closest image to the point clicked. Click on the thumbnail to dive into the image view.

Diving Into Images Via Camera
You can also dive into images by clicking on a camera in the viewer. A thumbnail of its image will appear next to your mouse cursor once clicked. Click on the thumbnail to dive into the image and see it overlaid above point clouds and BIM models. Our viewer allows zooming out of images from both point clouds and pins from the capture app, up to a field-of-view of 120 degrees.

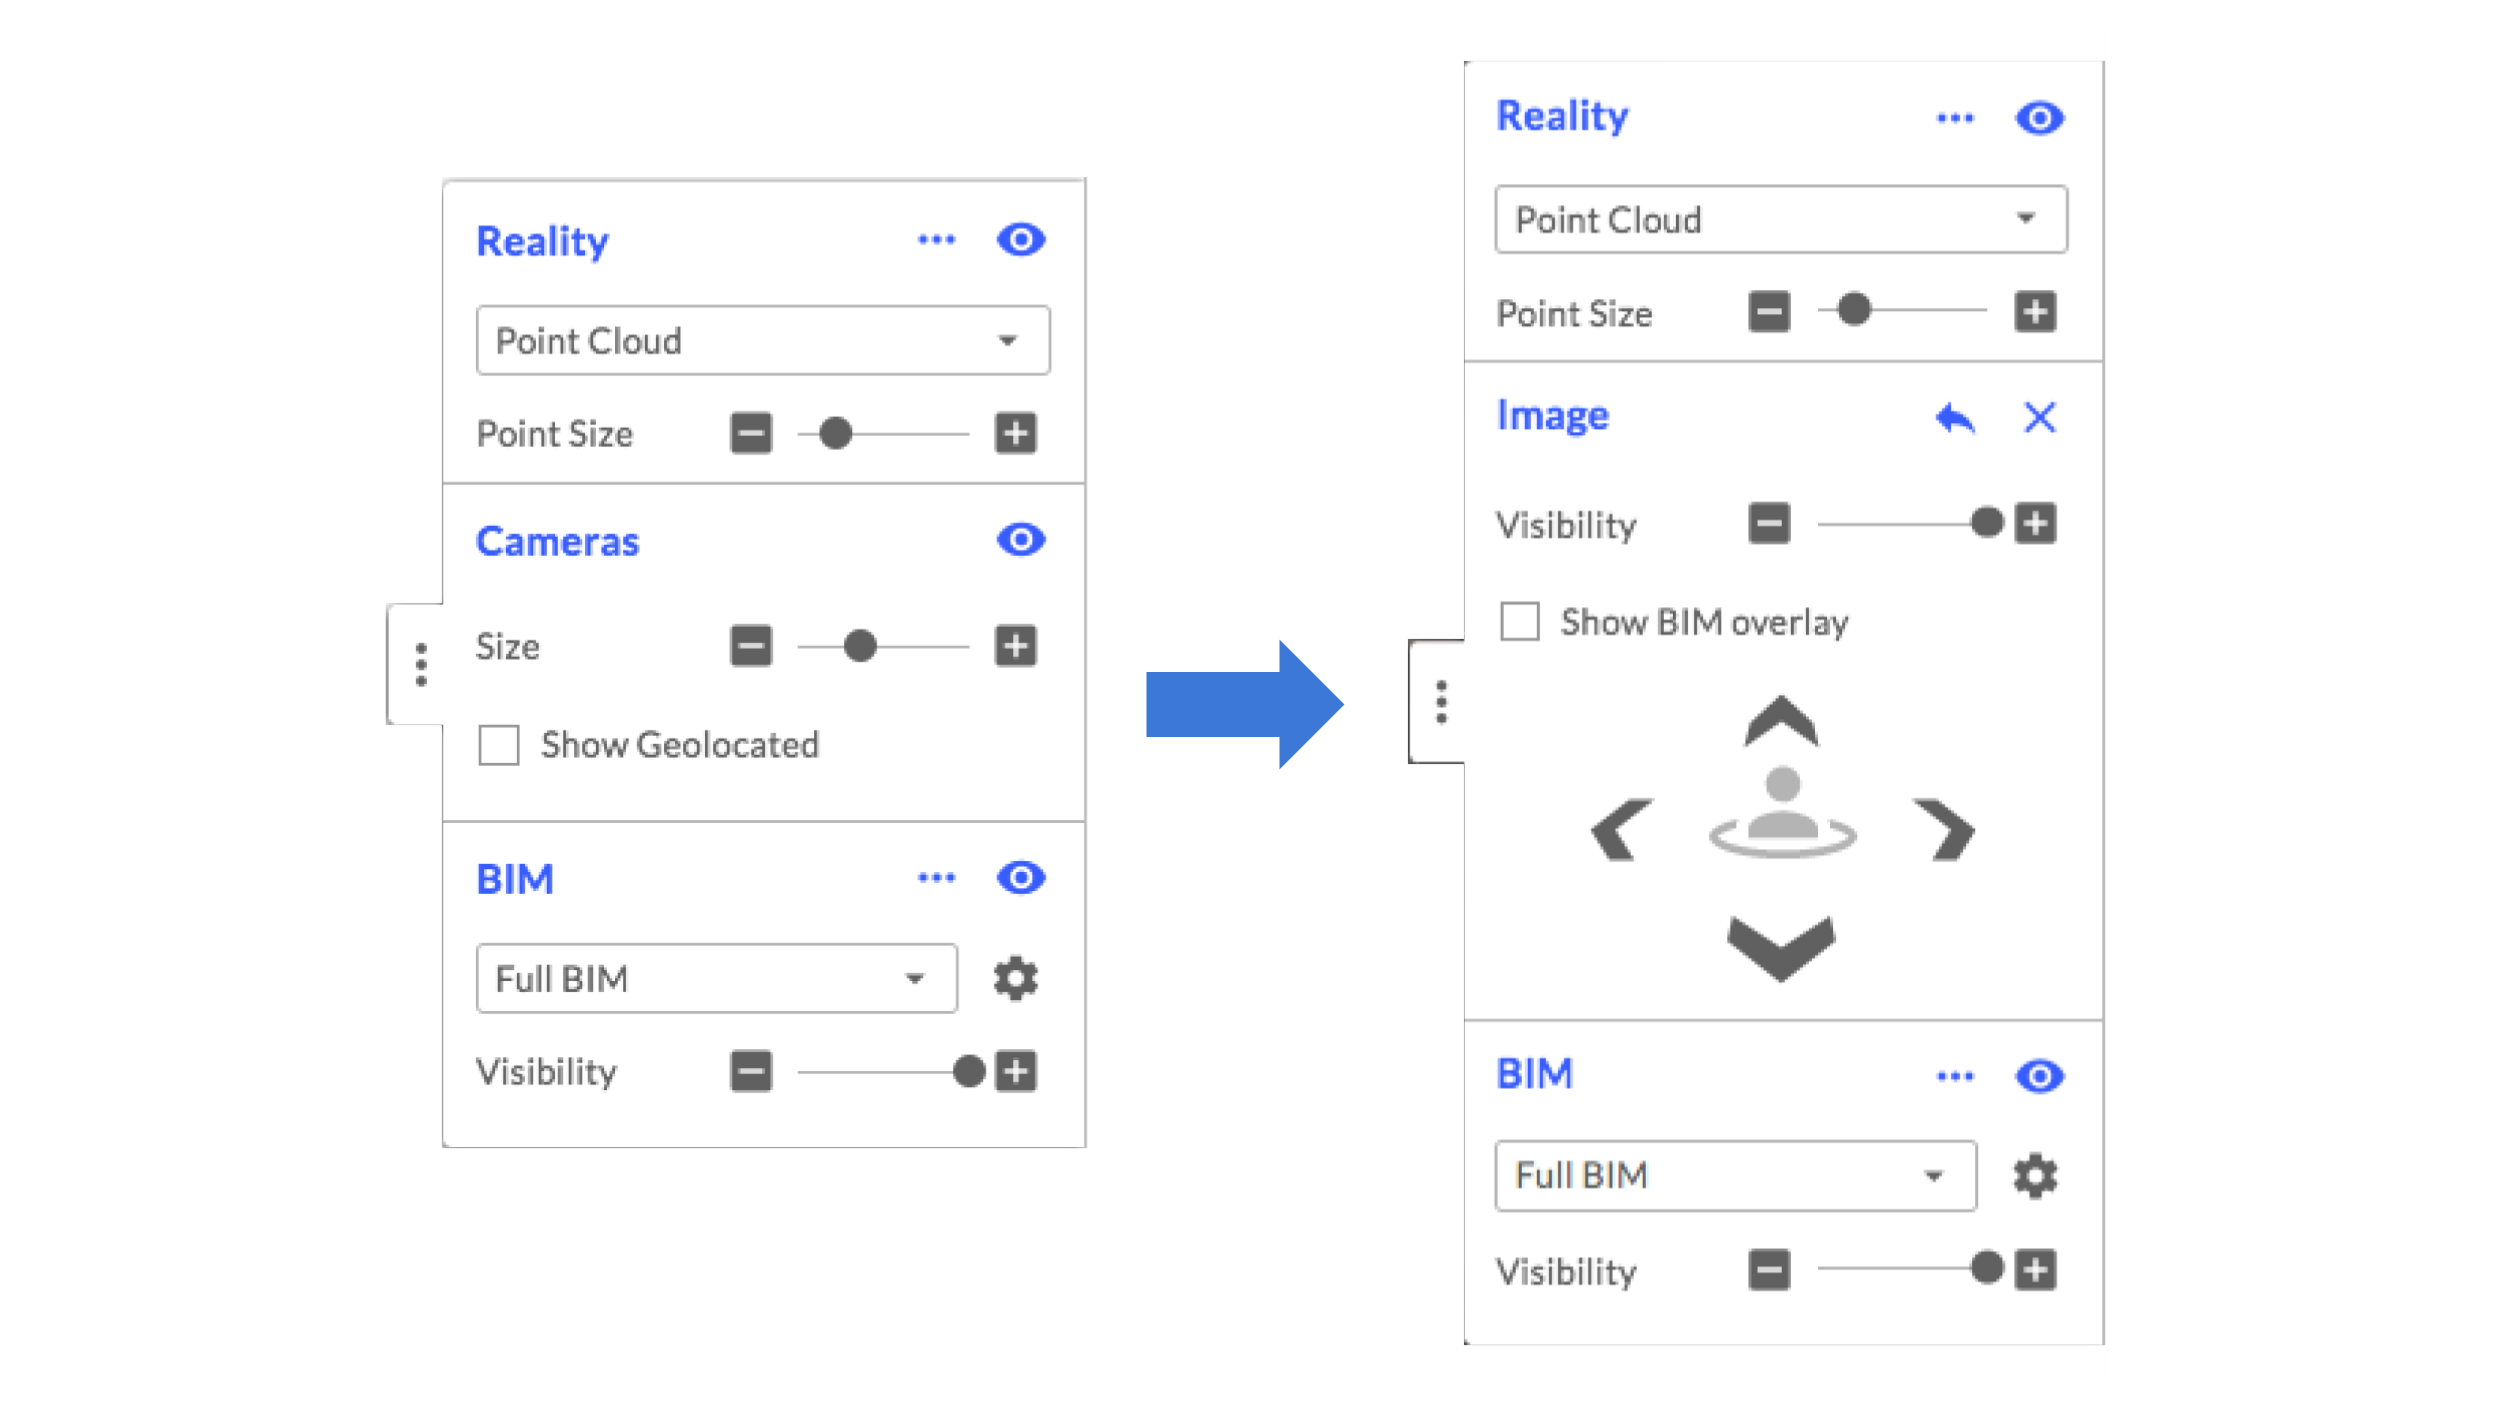
Adjusting Image Visibility
Adjust the visibility of images by dragging the "Visibility" slider to the desired transparency. This is useful for overlapping images on top of BIM. Reducing visibility enables users to easily compare images with BIM.
Overlaying BIM
Overlay BIM over images in the viewer by clicking the "Show BIM Overlay" box in the control panel. This changes the order of display in the viewer to bring BIM elements above images.
Using Arrows to Navigate Images
Clicking on one of the four arrows around the image icon while viewing an image jumps to the next nearest image in the corresponding direction.
Exiting Image
Click "Exit Image" on the main toolbar or click the "X" icon in the image section of the control panel to exit the image. Click the "back" icon next to the "X" to both exit the image and return to the home view.

Comments
0 comments
Article is closed for comments.